Updated on 2026-03-23
views
5min read
Picture this: you're doing a routine storage cleanup, removing folders that look safe, emptying the Trash—and only afterward do you realize that a client presentation due tomorrow was in one of those folders. That sinking realization, the file wasn't misplaced or hidden, it was gone, is one of the more stressful moments a Mac user can have.
The good news: deleted on Mac rarely means gone forever. What it actually means is that macOS has stopped tracking where the file lives and marked that storage space as available—but the data itself usually still exists until something new overwrites it. How much time you have depends on one critical variable: whether your Mac has an SSD (virtually every Mac from 2013 onward) or an older HDD.
Stop using your Mac now. Every file you save, every app you open, every download you run increases the chance of overwriting the space where your deleted file still exists. Work through these methods in order before doing anything else.
30-Second Self-Diagnosis: Find Your Solution Fast
| Your situation | Go to |
|---|---|
| Just deleted it — caught it immediately | Cmd+Z Undo |
| File is still in the Trash | Restore from Trash |
| Trash emptied, Time Machine was on | Time Machine |
| Trash emptied, iCloud Drive file | iCloud.com recovery |
| Deleted a photo | Photos app Recently Deleted |
| Trash emptied, no backup at all | Recovery software (read SSD warning first) |
| Mac has physical damage or won't boot | Professional service |
Understanding the SSD Warning (Read Before Using Recovery Software)
Modern Macs (MacBook 2013 and later, all M1/M2/M3 Macs) use SSDs with Apple's APFS file system and a feature called TRIM. When a file is deleted, TRIM notifies the drive controller that those storage blocks are now free—and the SSD begins erasing them proactively to maintain performance.
The practical consequence: on an SSD, the window between deletion and permanent data loss is measured in minutes to hours, not days. On an older HDD, deleted data can persist for weeks because the drive doesn't actively erase vacated blocks.
This is why speed is everything on a modern Mac, and why recovery software has a much lower success rate on SSDs (10–40%) than on HDDs (40–80%).
Method 1: Undo the Deletion Immediately (Cmd+Z)
Success rate: ~100% if used within seconds
This is the fastest method and the one most guides skip entirely. If you just deleted a file and haven't done anything else, press Cmd+Z immediately. macOS's event manager tracks recent actions and can reverse the deletion before anything overwrites the space.
You can also use the menu bar: Edit → Undo Move of [File Name].

This only works if the deletion was your most recent action and you haven't opened other apps or saved files since. Once you've done something else, Cmd+Z undoes that action instead. If this window has passed, move to the next method.
Method 2: Restore from Trash (Not Yet Emptied)
Success rate: ~100%
macOS moves deleted files to the Trash rather than immediately erasing them. Files stay there for 30 days by default, after which macOS permanently removes them automatically.
To restore a file: open Trash → right-click the file → Put Back. The file returns to its original location. To restore multiple files: select them all → right-click → Put Back.
If the Trash is cluttered and you're having trouble finding the file: press Cmd+Space to open Spotlight, search for the file name, and look for results showing location as Trash.
To disable the 30-day auto-purge: Finder → Settings → Advanced → uncheck "Remove items from the Trash after 30 days." This is useful if you prefer to manage Trash cleanup manually.

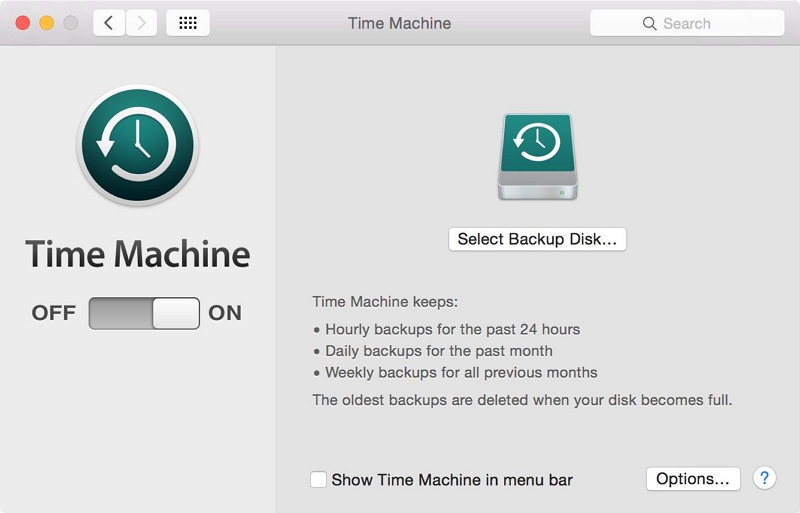
Method 3: Time Machine Backup
Success rate: ~95% when a backup predates the deletion
Time Machine is macOS's built-in backup system. If it was running before the deletion occurred, your file is almost certainly recoverable.
Check if Time Machine was running: Apple Menu → System Settings → General → Time Machine. If a backup disk is listed and shows a recent backup date, you're in good shape.
To restore a specific file:
- Open the folder where the file originally lived
- Click the Time Machine icon in the menu bar → Browse Time Machine (or access it through System Settings)
- Use the timeline on the right or the forward/backward arrows to navigate to a point before the deletion
- Find the file, select it, and click Restore
To search within Time Machine: use the Finder search bar in the top-right corner of the Time Machine interface to search by filename.
APFS Local Snapshots (no external drive needed): Even without an external backup drive, macOS may have created local snapshots automatically. Check what's available by opening Terminal and running: tmutil listlocalsnapshots /
If snapshots exist predating your deletion, Time Machine can restore from them without requiring an external drive.
Method 4: iCloud and App-Specific Recovery
These methods apply to specific file types and don't require any backup setup.
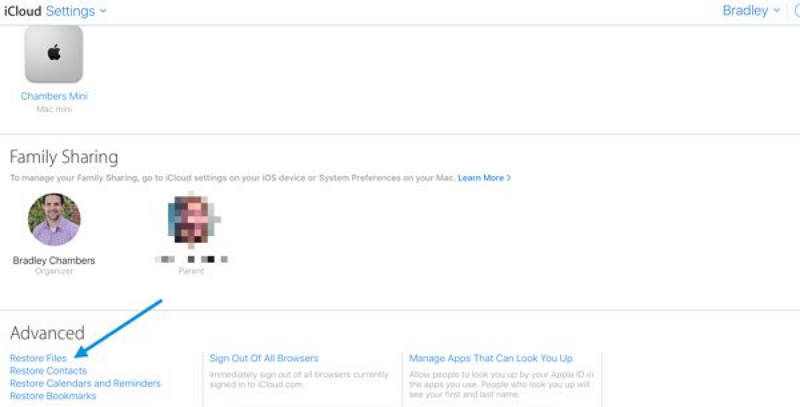
iCloud Drive Files
Sign into icloud.com → click your account name → Account Settings → scroll to Advanced → Restore Files. iCloud retains deleted files for up to 30 days. This works for files stored in iCloud Drive, independent of any local backup.
For version history on iCloud-synced documents: open the file in its app → File → Revert To → Browse All Versions. Navigate the timeline to find the version you need.
Photos
Open the Photos app → Albums → scroll to Recently Deleted. Deleted photos stay here for 30 days. Select and click Recover. If iCloud Photos is enabled, check iCloud.com as well—the Recently Deleted album syncs across devices.
Pages, Numbers, and Keynote
These apps have built-in version history: File → Revert To → Browse All Versions. Navigate to before the deletion and click Restore. No backup or iCloud required.
Word, Excel, and Office Files
If you use Microsoft 365 with OneDrive, files have version history accessible through OneDrive. For locally saved Office files, AutoRecovery may have a recent version: press Cmd+Shift+G and navigate to:
~/Library/Containers/com.microsoft.Word/Data/Library/Preferences/AutoRecovery
Substitute "Word" with "Excel" or "PowerPoint" for those file types.
iTunes and Apple Music Purchases
Purchased content can be re-downloaded without recovery tools. Open Music → find the album or track → click the download icon. This applies to anything you've purchased from the iTunes Store; it's permanently associated with your Apple ID.
Method 5: Recovery Software (No Backup, Trash Emptied)
Success rate: 10–40% on SSD | 40–80% on HDD
When no backup exists and the Trash has been emptied, dedicated recovery software is the only remaining option. These tools scan your drive's raw storage for file fragments that haven't yet been overwritten—a process that works better on HDDs and requires acting quickly on SSDs.
Critical rule: Install recovery software on a different drive than the one you're scanning. Installing on the same drive can overwrite the exact data you're trying to recover. Use an external USB drive or download to a second internal drive.
Recommended Tools
Datile Computer Recovery is the tool most frequently recommended in technical communities for Mac-specific recovery. It supports APFS, HFS+, and exFAT; has a clean interface suitable for non-technical users; and offers a free version that lets you preview recoverable files before paying. This preview step is important—it confirms whether your file is actually recoverable before you commit to purchasing.
TestDisk / PhotoRec (free, open-source) is the option for technically confident users. PhotoRec recovers files by type regardless of filename, making it highly effective but producing results that need manual sorting. Both tools are free with no recovery limits.
EaseUS Data Recovery Wizard for Mac has a 2GB free recovery limit, which is sufficient for recovering a few documents or photos. Useful for smaller recoveries where you want a GUI without paying upfront.
General Recovery Workflow
1. Download recovery software to an external drive (not the drive you're scanning)
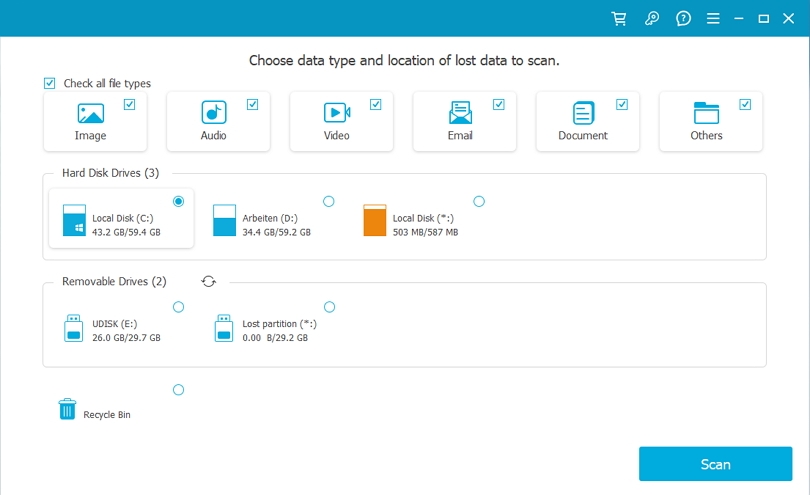
2. Launch the software and select the drive where the deleted file lived
3. Choose scan type: Quick Scan for recently deleted files, Deep Scan if Quick Scan doesn't find it
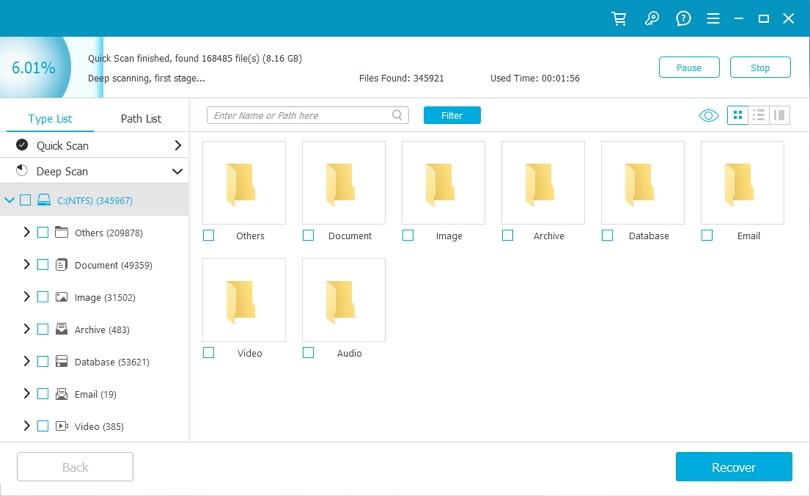
4. Filter results by file type or search by filename to locate your file
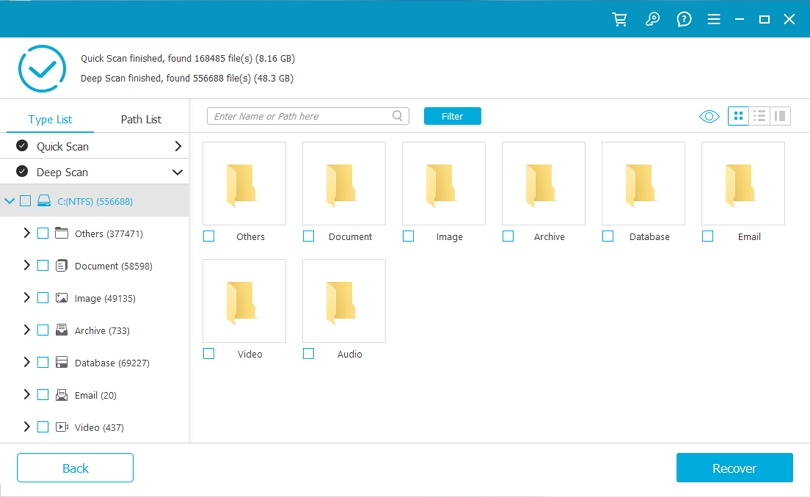
5. Preview the file to confirm it's intact before recovering
6. Restore to a different drive than the source—never recover to the same drive you scanned
Special Situations
Mac Won't Boot — Recovering Files Without Starting macOS
Connect the non-booting Mac to a working Mac using a USB-C cable. Hold T while powering on the faulty Mac until a Thunderbolt icon appears—this is Target Disk Mode, which makes the faulty Mac appear as an external drive on the working Mac. You can then copy files directly.
Alternatively, hold Cmd+R (Intel Mac) or hold the power button (Apple Silicon) during startup to enter macOS Recovery. From here you can access Disk Utility, reinstall macOS, or restore a Time Machine backup.
Files Deleted from External Drive or USB
Files deleted from external storage follow the same rules as HDDs regardless of the drive type—they bypass the Mac's Trash and may be directly recoverable. Attach the drive and run recovery software, selecting the external drive as the scan location.
Files Deleted After Formatting a Drive
Formatting clears the directory structure but doesn't immediately erase all data. Recovery software with deep scan capability can sometimes reconstruct files. Success rate varies widely (20–60%) and decreases rapidly the more the drive has been used after formatting.
Files Deleted by Malware or Ransomware
Disconnect from the internet immediately to stop any ongoing data exfiltration or encryption. Remove the malware before attempting recovery—running recovery tools while malware is active can result in recovered files being re-infected. Restore from a Time Machine or iCloud backup if one exists. If not, use recovery software after confirming the threat is removed.
Recovering Files from a Lost or Stolen Mac
If Find My was enabled, sign into icloud.com → Find My and lock the device remotely. Any files synced to iCloud before the loss are accessible by signing into iCloud on a new device. Time Machine backups on an external drive remain yours regardless of what happens to the Mac itself.
Recovery Success Rate Reference
| Scenario | Realistic success rate |
|---|---|
| Undo (Cmd+Z) used immediately | ~100% |
| Trash not emptied | ~100% |
| Time Machine backup exists | ~95% |
| iCloud Drive / app version history | ~90% |
| HDD, Trash emptied, no backup | 40–80% |
| SSD, Trash emptied, no backup | 10–40% |
| After drive formatting | 20–60% |
| Physical drive damage | Requires professional service |
When to Call a Professional Data Recovery Service
Professional services (typically $300–$1,500) are warranted in two scenarios: physical drive damage, and situations where DIY methods have failed and the data is genuinely irreplaceable.
Signs physical damage is involved: clicking or grinding sounds from the drive, drive not recognized by macOS or Disk Utility, burning smell. Do not attempt software recovery on a physically damaged drive—it can cause further damage.
Reputable services will diagnose before charging, provide a realistic recovery estimate, and return the drive with your data regardless of success. Be cautious of services that charge the full amount before demonstrating recovery success.
Prevention: Build a Bulletproof Mac Backup System
The 3-2-1 rule is the standard framework: 3 copies of important data, on 2 different media types, with 1 copy off-site (cloud or remote location). In practice for most Mac users: Time Machine to an external drive (local backup) + iCloud Drive sync (off-site backup) + the original file.
How to set up Time Machine properly
Step 1: Apple Menu → System Settings → General → Time Machine
Step 2: Click General and then head to Time Machine. However, you should have an external drive connected.
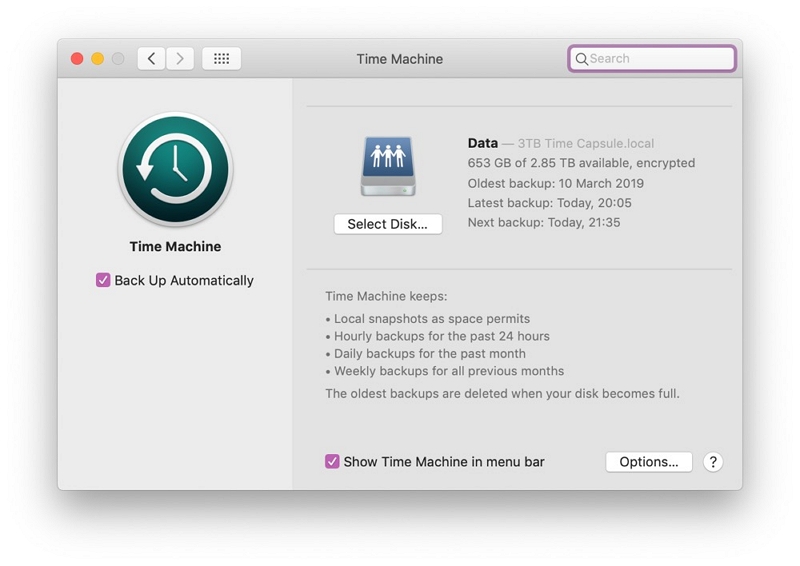
Step 3: In the Time Machine Settings, click “Add Backup Disk” or simply hit the ‘+’ button and select your drive.
What iCloud Drive does and doesn't protect: iCloud syncs Desktop, Documents, Photos, and Drive contents across your devices. It does not back up system files, apps, or local files outside the synced folders. iCloud is not a substitute for Time Machine—it's a complement to it.
The most overlooked habit: test your backups periodically. A backup you've never restored from is a backup you don't actually know works. Once every few months, try restoring a random file from Time Machine to confirm the backup is healthy.
FAQs
Q. Can I recover files deleted months ago on Mac?
Unlikely without a backup. Modern SSDs with TRIM actively erase deleted data, and months of normal use will have overwritten the space many times over. Time Machine is your only realistic option if a backup from the relevant period exists.
Q. Does Apple have a free built-in data recovery tool?
Time Machine is the closest equivalent—it restores files to previous states. macOS doesn't include a traditional undelete tool. For files outside Time Machine's coverage, third-party software is required.
Q.How do I recover deleted files without any software?
Check Trash, use Cmd+Z undo, check iCloud Drive recovery at icloud.com, use app-specific version history (File → Revert To), or restore from a Time Machine backup. These cover most common deletion scenarios without additional software.
Q. Does emptying Trash permanently delete files?
On an SSD, effectively yes within a short window. On an HDD, the data persists longer but is still vulnerable to overwriting. Recovery software can sometimes retrieve files after Trash is emptied, but success rates drop significantly compared to pre-empty recovery.
Q. Is free recovery software safe to use?
Open-source tools like TestDisk and PhotoRec are safe and widely used. For commercial tools, download only from official websites—pirated versions of paid software frequently contain malware. Never install recovery software on the drive you're trying to recover.
Q. Can Time Machine recover files deleted years ago?
Yes, if a backup from that period still exists on your backup drive. Time Machine keeps hourly backups for 24 hours, daily backups for a month, and weekly backups until the drive fills up, at which point the oldest backups are deleted to make room.